Create a Newsletter Popup
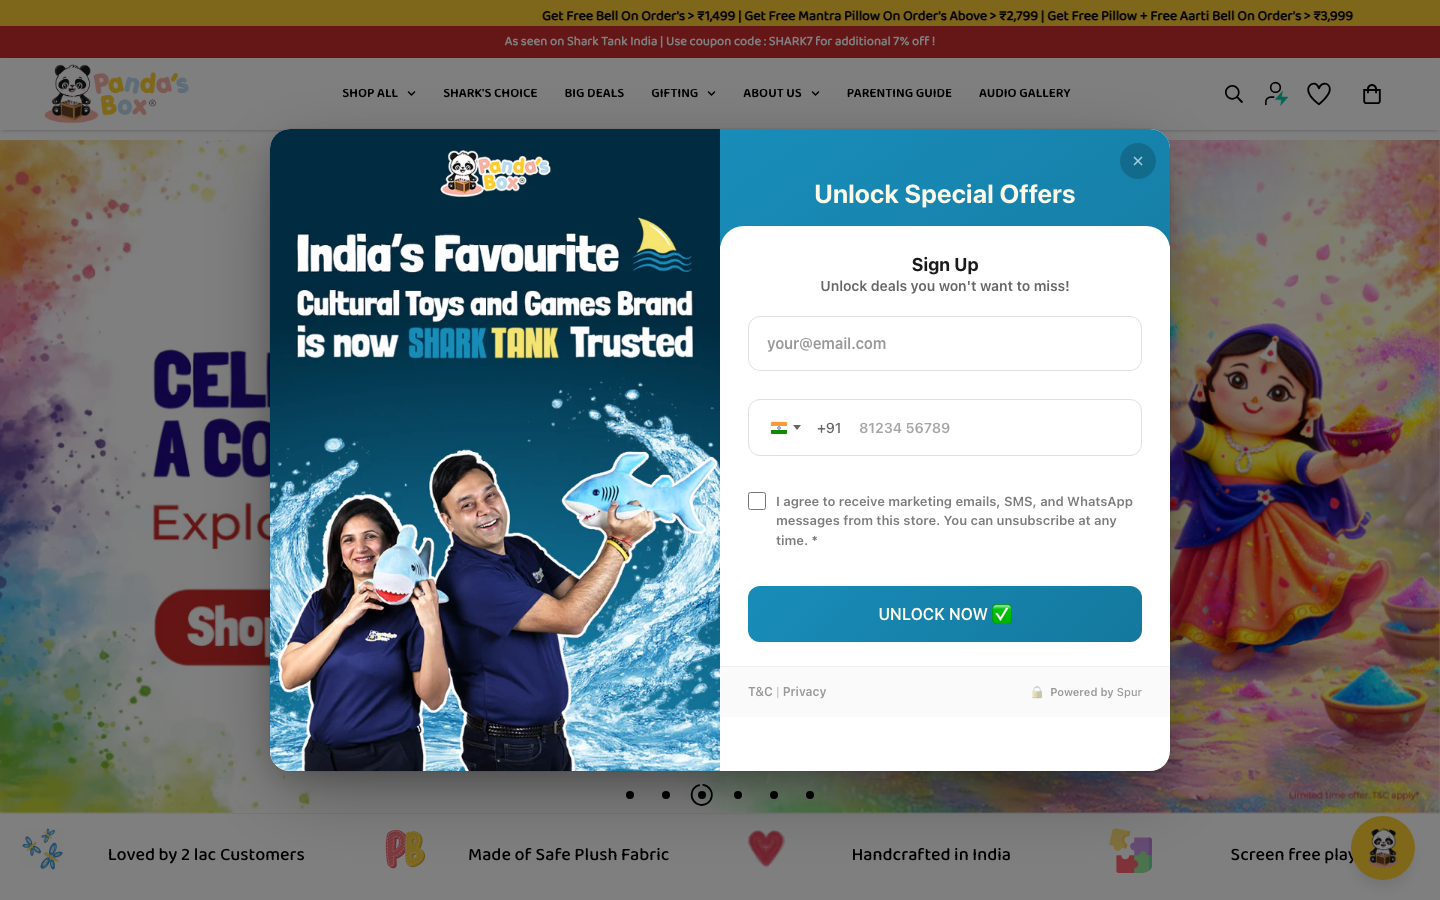
The Newsletter Popup is a clean, simple signup form that collects email addresses and phone numbers from your visitors. Offer a discount code as an incentive and start building your subscriber list.
Best For
- • Building email lists quickly
- • SMS and WhatsApp marketing signups
- • Professional, clean-looking brands
- • Stores that want simplicity over gamification
How It Works
- 1. Visitor sees the popup on your store
- 2. They enter their email (and optionally phone/name)
- 3. They get a discount code displayed immediately
- 4. You get a new subscriber in your list
In this guide
1Create the Popup
From your Spur Popups dashboard, click "Create Popup" and select "Newsletter Signup".
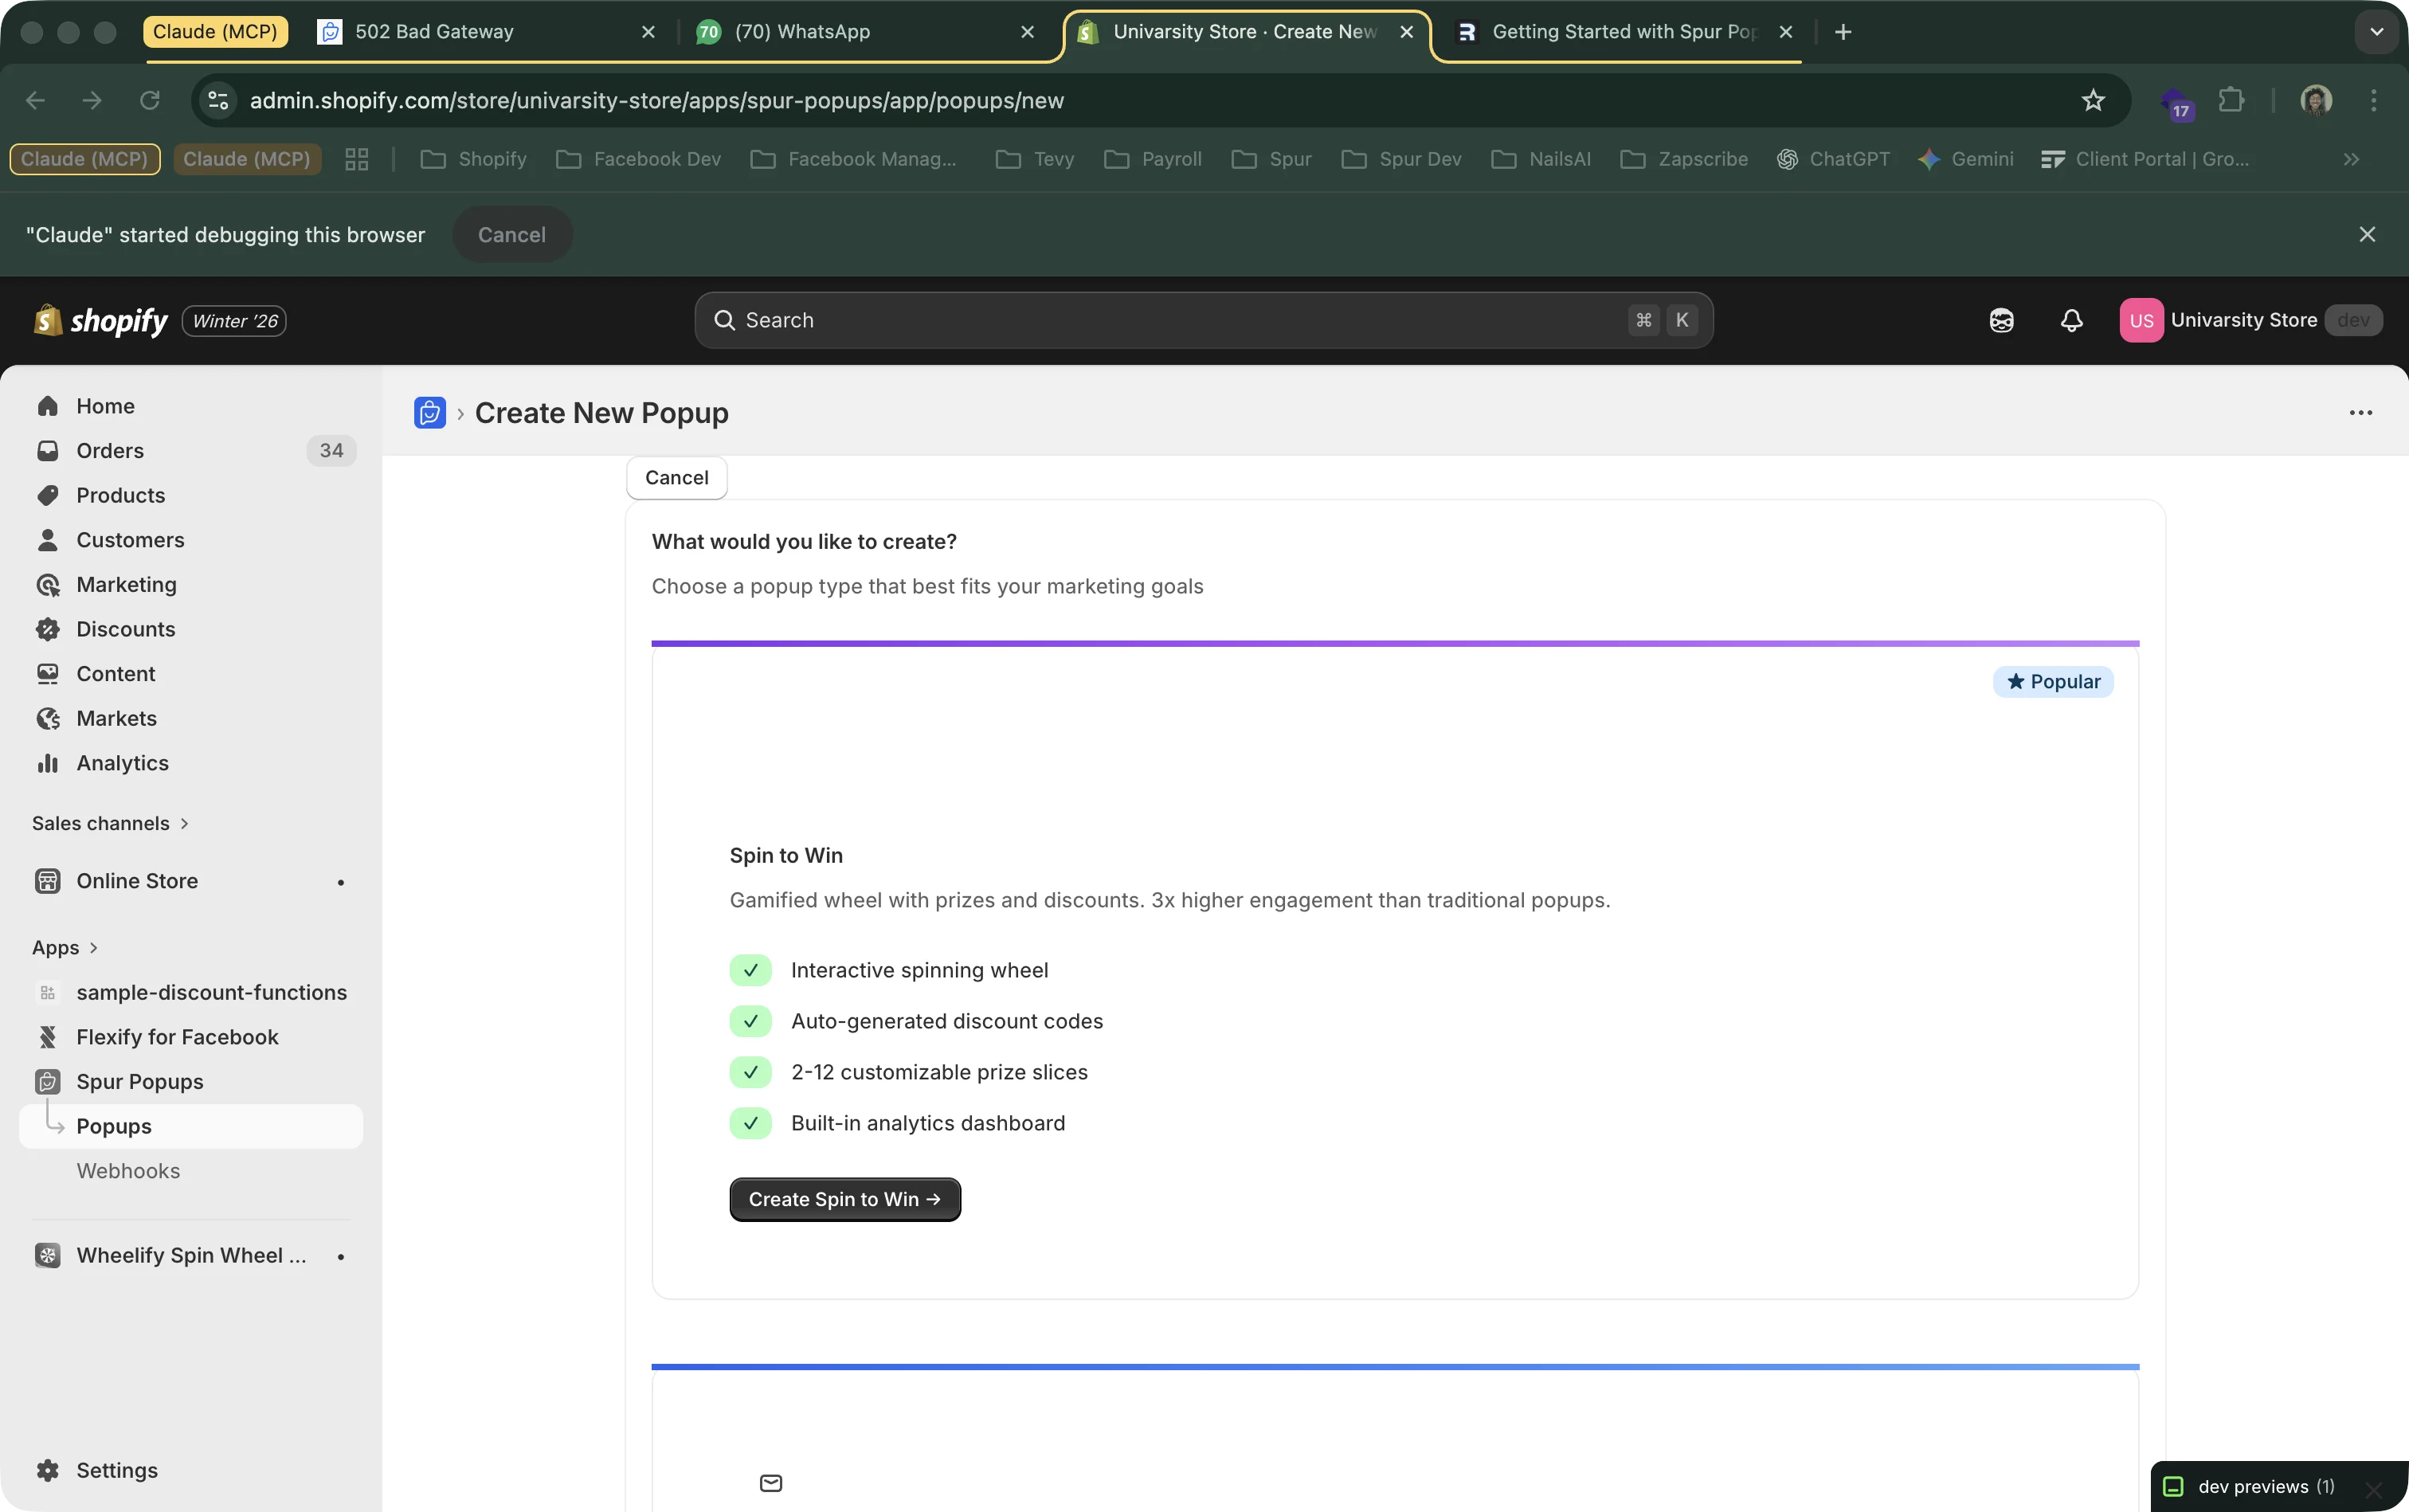
Not sure which type to pick? Newsletter is the simplest option. If you want more engagement, try a Spin to Win or Scratch Card — gamified popups typically get 3x more signups.
2Basic Setup
After creating the popup, you'll see the editor with a live preview on the right. Start by filling in the basic information:
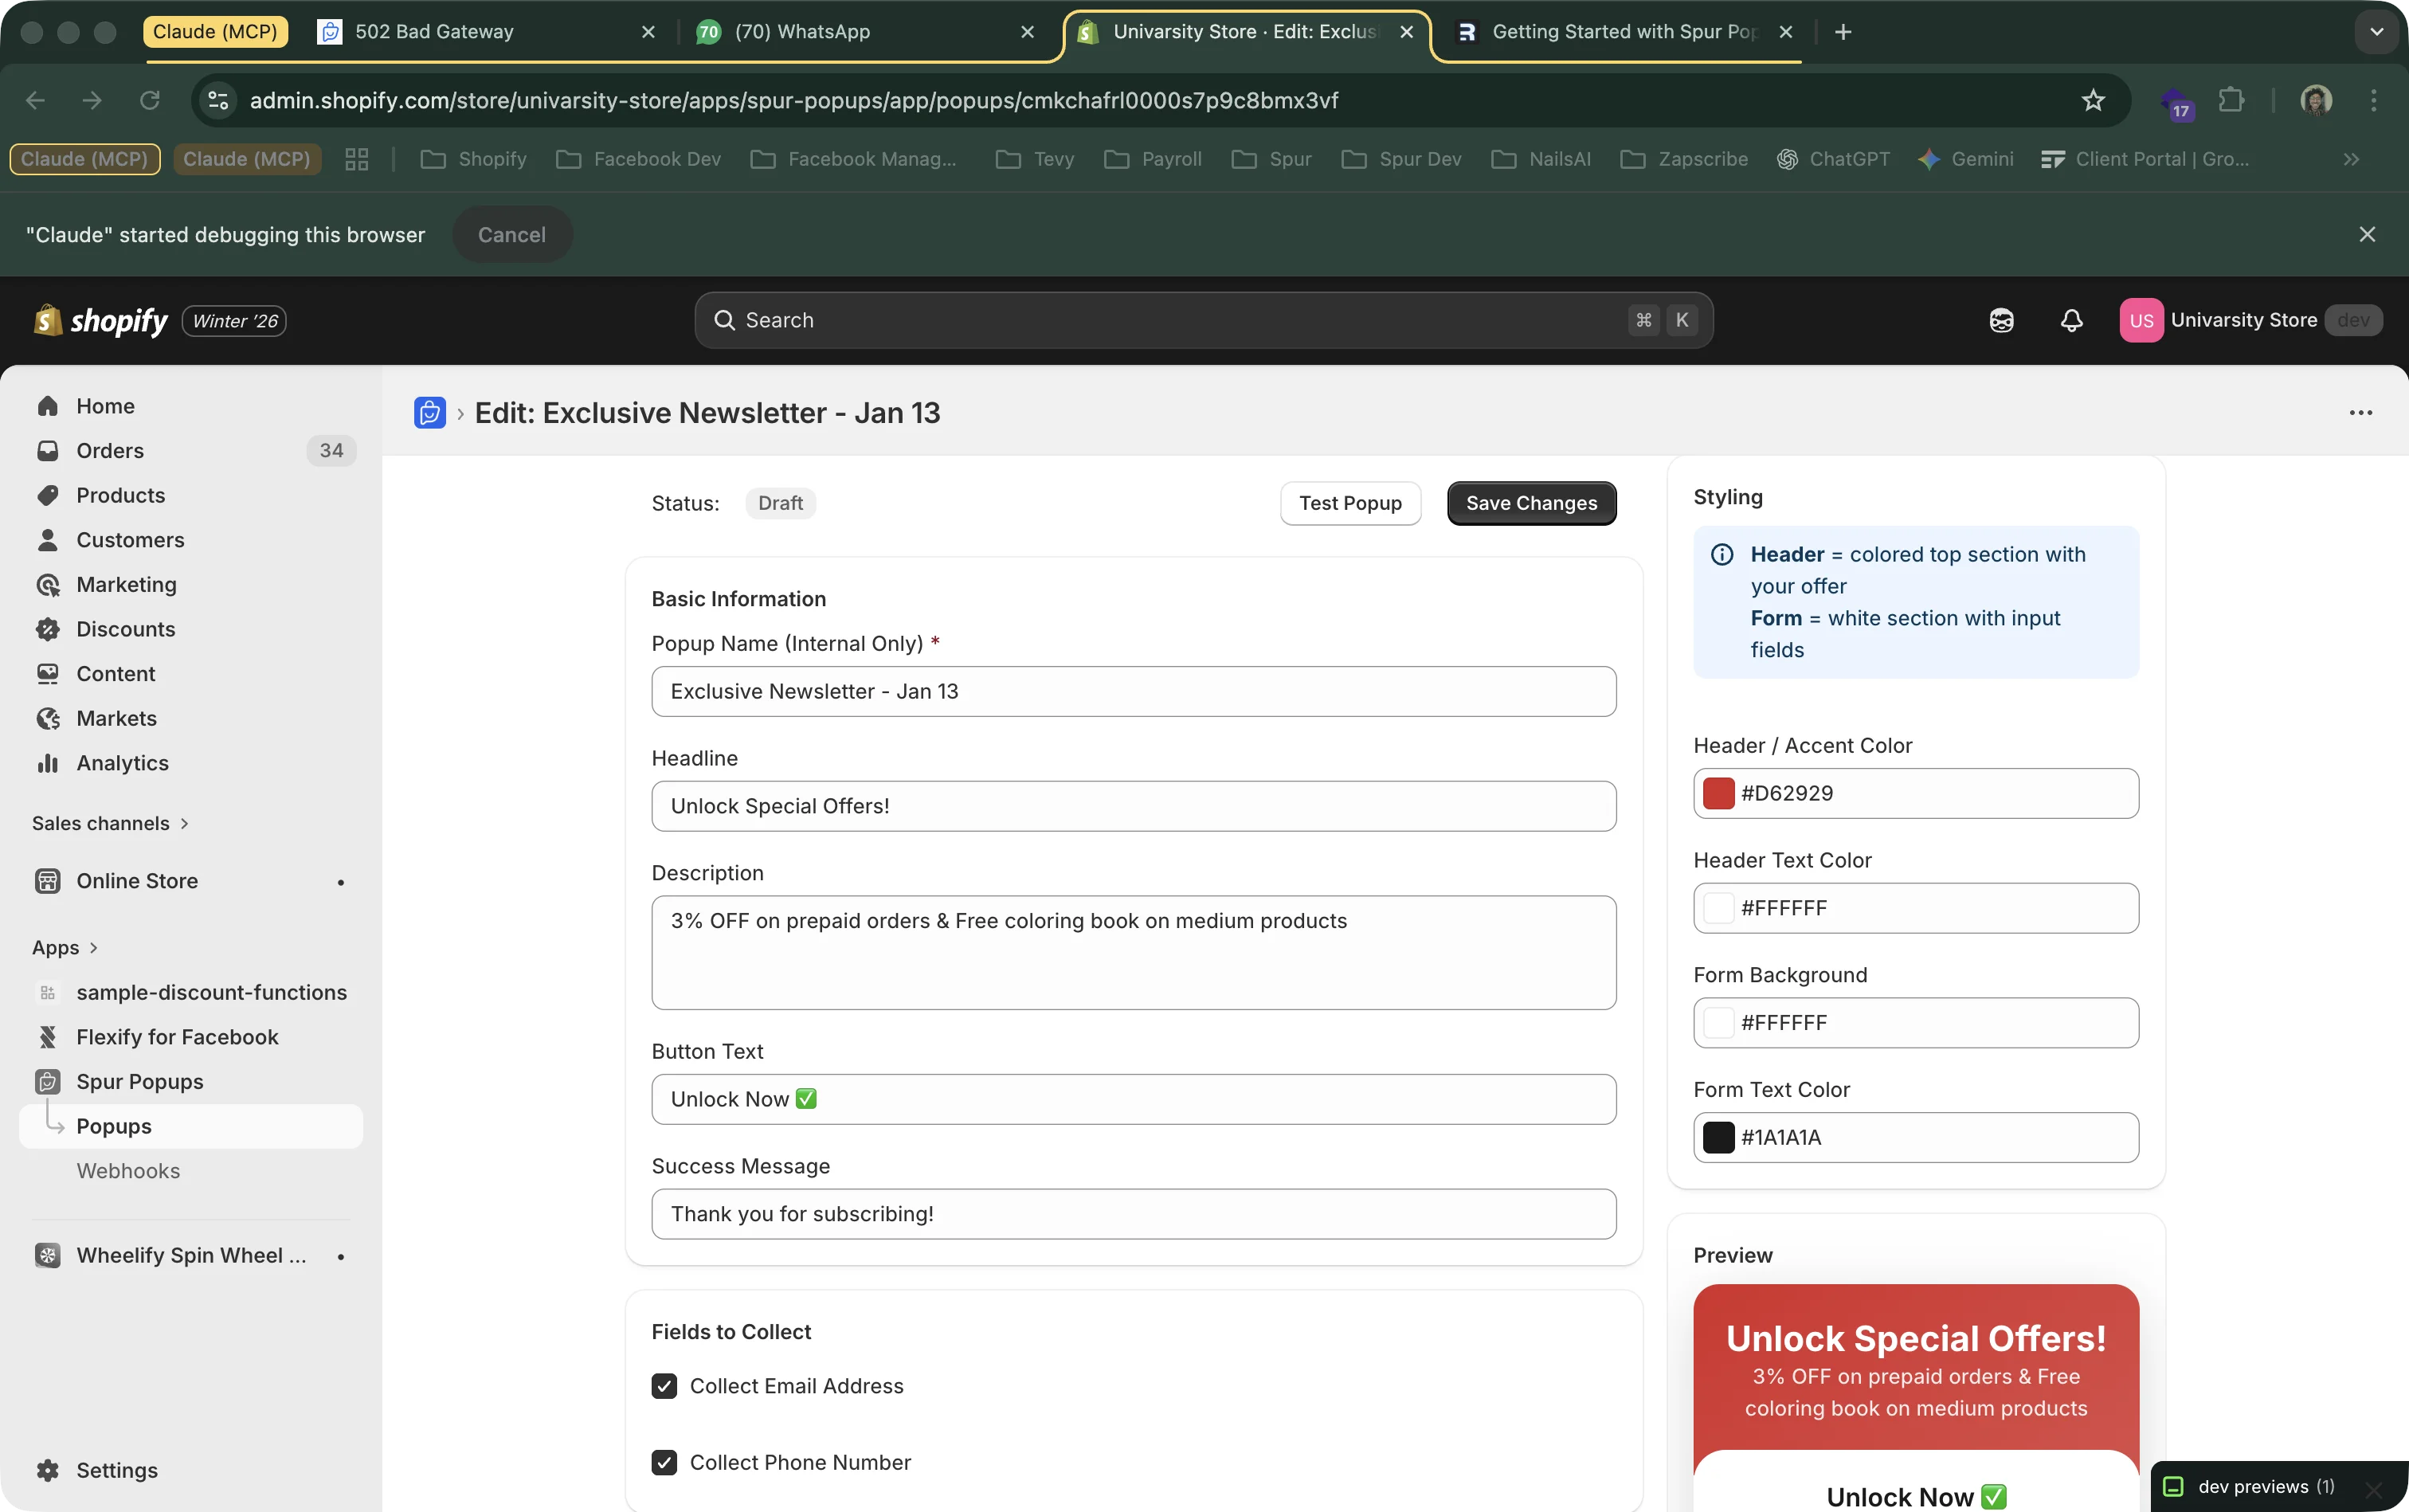
Popup Name
An internal name to identify this popup (e.g., "Summer Newsletter"). Only you see this — visitors never see it.
Headline
The big text at the top of your popup. Make it compelling. Examples: "Get 10% Off Your First Order", "Join the VIP List", "Exclusive Deals Inside".
Description
Supporting text that tells visitors what they get. Example: "Sign up and we'll send you a discount code right away."
Button Text
The call-to-action on the submit button. Action-oriented text works best: "Get My Discount", "Claim Offer", "Subscribe Now".
3Customize Form Card Copy
This is the most important section for merchant-facing copy updates. In the editor, open Form Card Copy and configure both variants:
Discount Form Title and Subtitle
Shown when Offer discount incentive is enabled (example: "Sign Up" and "Unlock deals you won't want to miss!").
Non-Discount Form Title and Subtitle
Shown when no discount is offered. Set this separately so merchants don't see old or mismatched text.
Merchant QA flow: toggle Offer discount incentive ON and OFF in the same editor session, and confirm both copy variants update correctly in the preview before sharing.
4Choose Which Fields to Collect
Decide what information you want from visitors. You can toggle each field on or off:
Email Address
RecommendedThe most important field. You need at least email to build a useful subscriber list. Always keep this enabled.
Phone Number
Collects phone numbers with automatic country code detection (based on visitor location). Useful if you plan to send SMS or WhatsApp messages via Spur automation.
Name
Optional. Useful for personalized email campaigns (e.g., "Hi Sarah, here's your code!"). Adds one more field for visitors to fill, which can slightly reduce conversions.
Conversion Tip
Fewer fields = more signups. Every extra field you add reduces your conversion rate. Start with email only. Once you're getting signups, test adding phone number to see how it affects your numbers. You can check your analytics to compare.
5Set Your Discount
Choose what discount subscribers get after signing up. Spur automatically creates a unique Shopify discount code for each person:
Percentage Off
A percentage discount like 10% OFF or 15% OFF. The most common choice.
Fixed Amount Off
A dollar/currency amount like $5 OFF or $10 OFF. Works well for stores with higher price points.
Free Shipping
A free shipping code. Good alternative if you don't want to discount your products.
How discount codes work
Each subscriber gets their own unique code (e.g., "SPUR-A7X2K9"). The code is created automatically in your Shopify admin as a single-use discount. It's shown to the visitor immediately after they sign up, and you can also send it via WhatsApp or email using Spur automation.
6Customize Success Screen
To control the post-signup experience (including the Shop Now button), use the Success Screen Configuration fields under Discount Offer:
Success Heading
Main text after submission (example: "Success! Here's your code:").
Success Message
Supporting message shown on successful signup.
CTA Button Text and URL
Set your button label (for example, "Shop Now") and landing path (for example, /collections/all).
Code Visibility Controls
Toggle whether to show the discount code and copy button, and customize code box colors.
Before sharing with merchants: test on desktop and mobile preview URLs, then verify text wraps cleanly and the CTA remains fully visible without clipping.
Can I update this after customers already submitted?
Yes. You can edit success screen text and CTA anytime, even after the popup has collected submissions.
- 1. Update fields in the popup editor and click Save Changes.
- 2. New visitors and new submissions will see the updated content.
- 3. Past submissions and already generated discount codes are not changed retroactively.

7Marketing Consent
Configure consent checkboxes so visitors opt in to your marketing. You can choose between:
Bundled Consent
A single checkbox covering all channels (email + SMS + WhatsApp). Simpler for visitors.
Unbundled Consent
Separate checkboxes for each channel. Required in the EU and other regulated regions.
Don't worry about GDPR: Spur automatically detects visitor location and switches to unbundled consent for EU visitors, even if you have bundled consent enabled. Learn more in our GDPR & Compliance guide.
8Colors and Styling
Match your popup to your brand. Every color change updates instantly in the live preview:
Header & Button Color
Background color of the header bar and submit button. Use your brand's primary color.
Header & Button Text Color
Text color on the header and button. Make sure it contrasts well for readability.
Form Background
Background behind the input fields and description text. White works for most brands.
Display Delay
How many seconds to wait before showing the popup (0–60). A 3–5 second delay lets visitors see your store first.
9Save and Activate
When you're happy with your popup:
- Click "Save Changes" in the editor
- Go back to your dashboard
- Flip the toggle switch next to your popup to activate it
- Use the "Test Popup" button to preview it on your store
Remember: Only one popup can be active at a time. Activating this popup will automatically deactivate any other active popup. Also make sure your app embed is enabled or the popup won't appear.
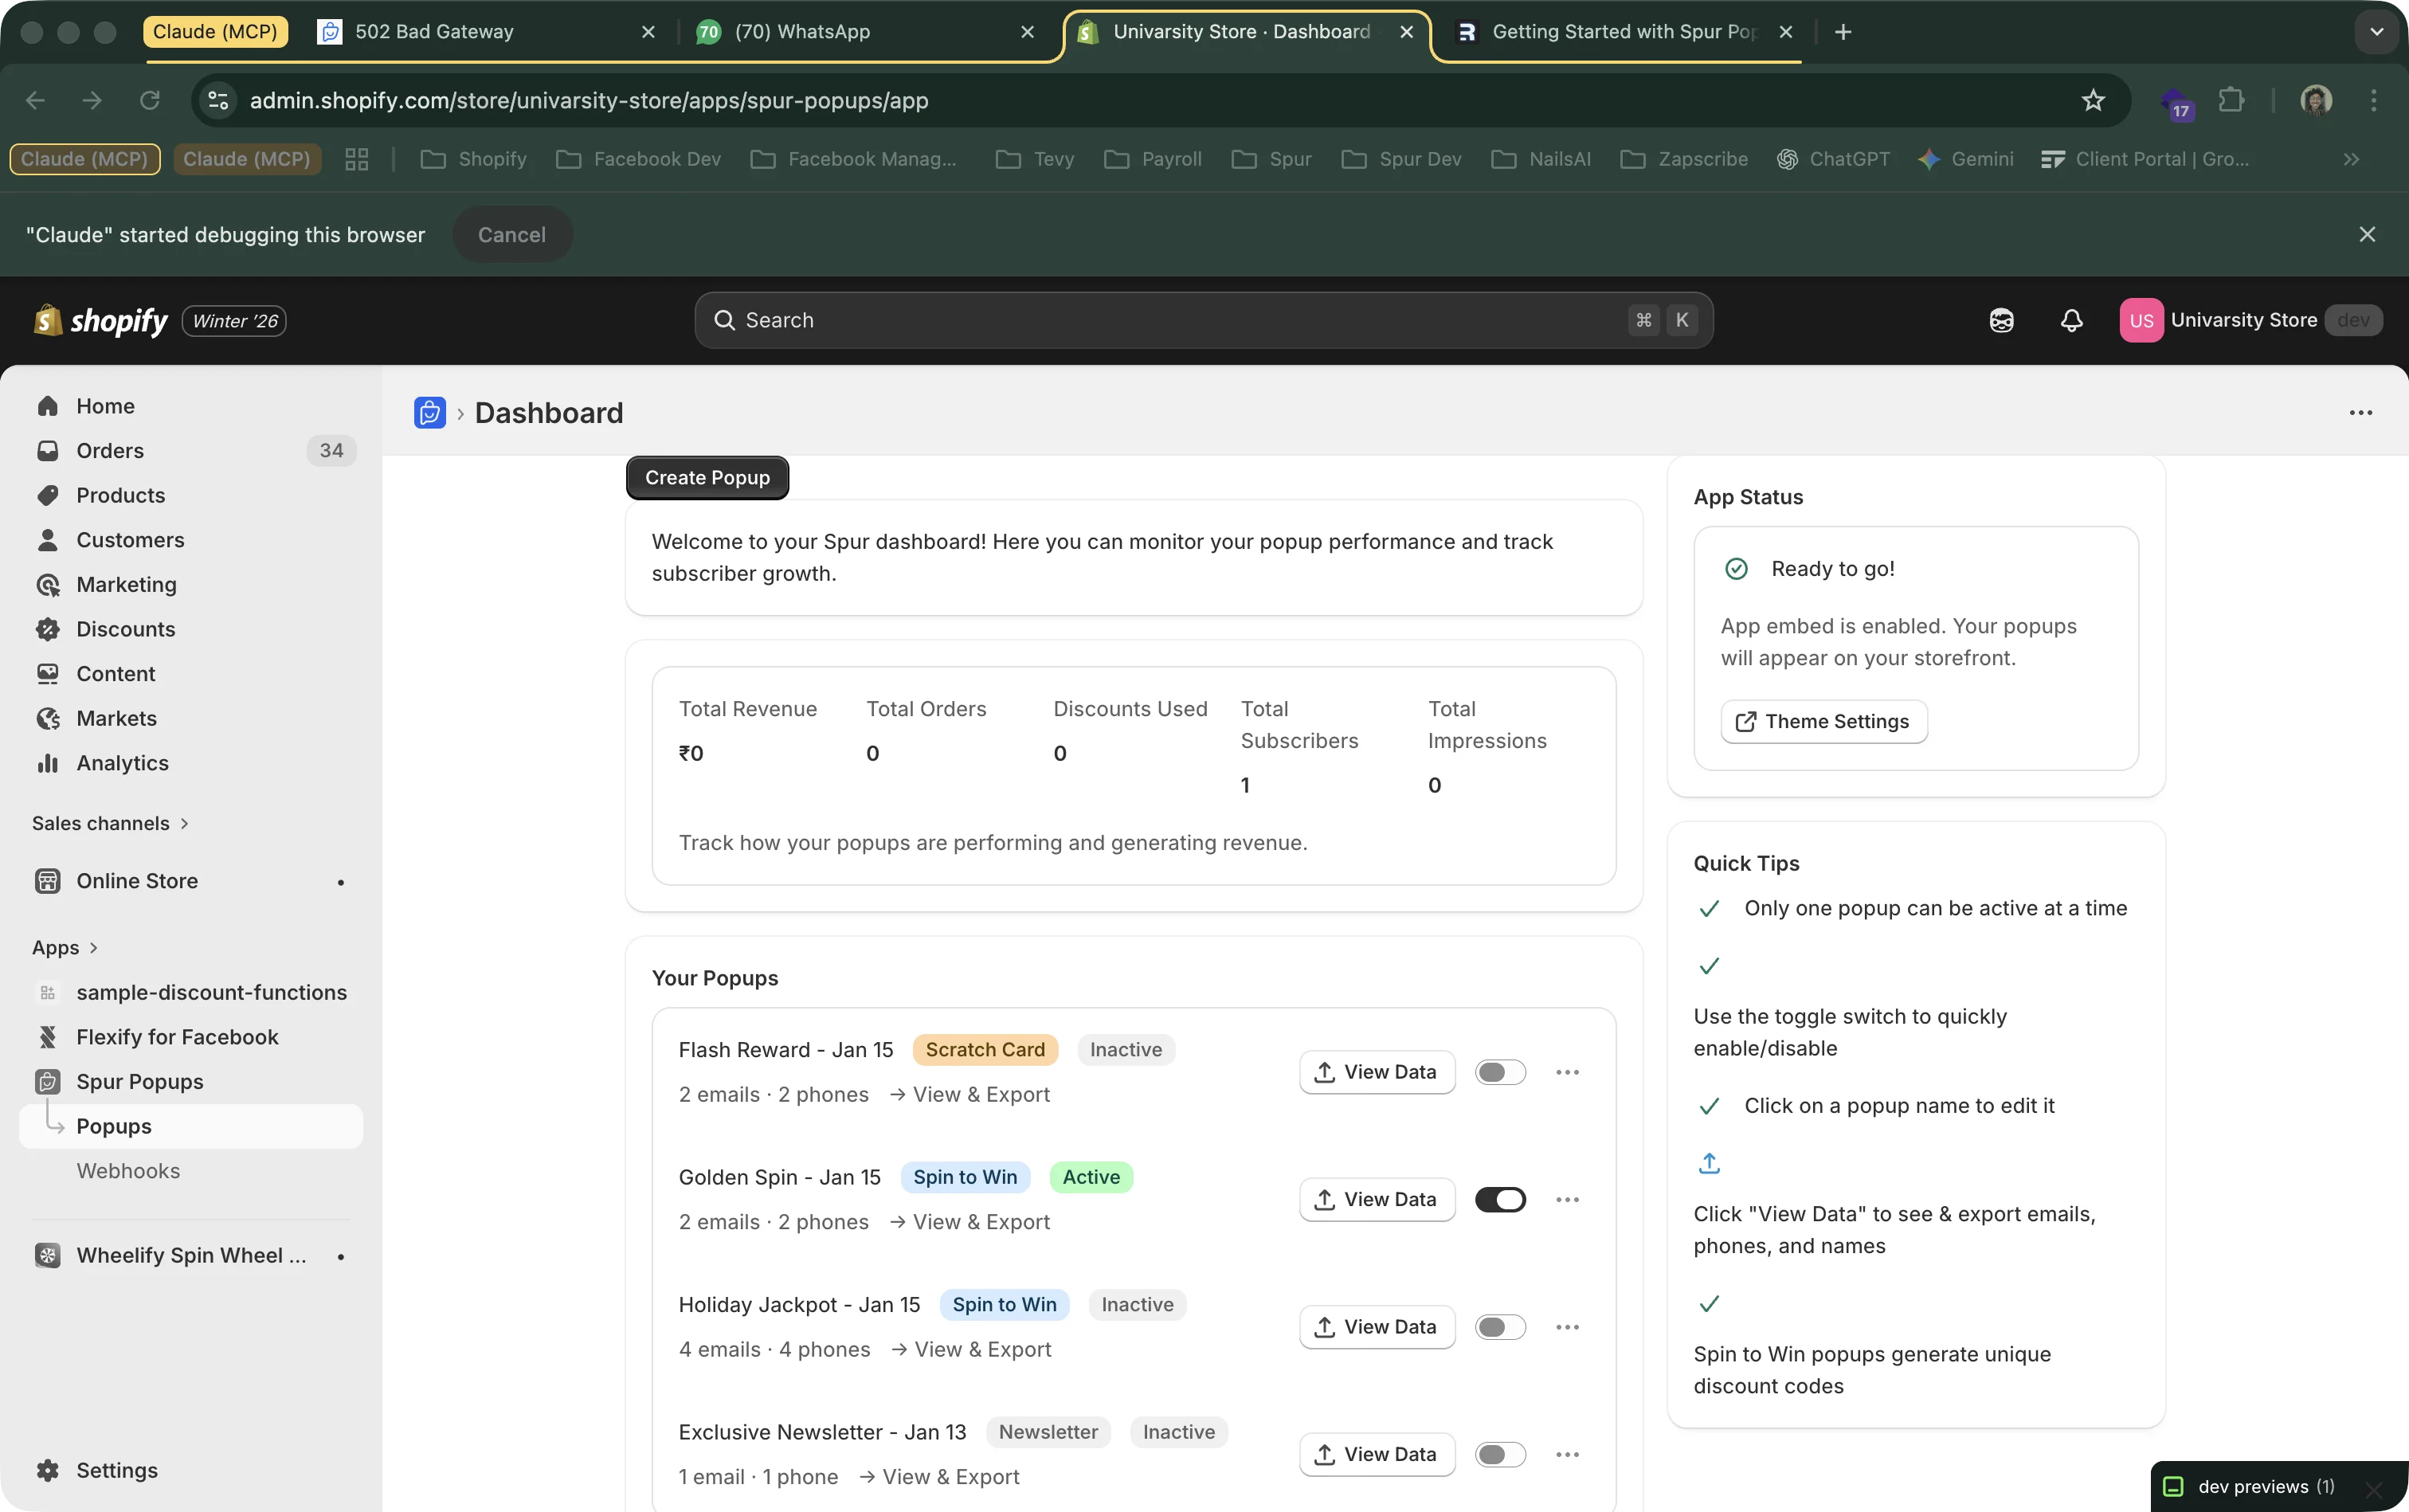
Viewing Your Subscribers
Unlike Spin to Win and Scratch Card popups (which have detailed analytics dashboards), Newsletter popups show a simple subscriber list when you click "View Data" on your dashboard. You'll see:
- Email address and phone number of each subscriber
- The discount code they received
- When they signed up
- Whether they consented to marketing
You can export everything as a CSV to import into your email marketing tool. For automatic syncing, set up webhooks to send subscriber data to your tools in real time.