Getting Started with Spur Popups
This guide walks you through everything from installing the app to getting your first popup live on your store. No coding required.
In this guide
1Install the App
Install Spur Popups from the Shopify App Store. The app is completely free to install with no monthly subscription fees.
- Go to the Shopify App Store
- Search for "Spur Popups"
- Click "Install" and authorize the app when prompted
- You'll be redirected to your Spur Popups dashboard inside your Shopify admin
What happens during installation
Spur Popups requests permission to read your theme settings (to check the app embed), manage discounts (to auto-generate coupon codes), and manage customers (to create Shopify customer records for subscribers). No data is shared with third parties.
2Enable the App Embed
Before your popups can appear on your store, you need to enable the Spur Popups app embed in your Shopify theme. This is a one-time setup.
Important: If you skip this step, your popups won't show up on your storefront even if they're activated. This is the #1 reason new users think their popup isn't working.
Look at the App Status card in the sidebar of your dashboard. It tells you whether the embed is enabled:
Ready to go!
You're all set. Popups will appear on your storefront.
Action needed
Click "Enable App Embed" to open your theme editor and toggle it on.
For detailed instructions, see the full App Embed setup guide.
3Your Dashboard
The dashboard is your home base. Here's what you'll see:
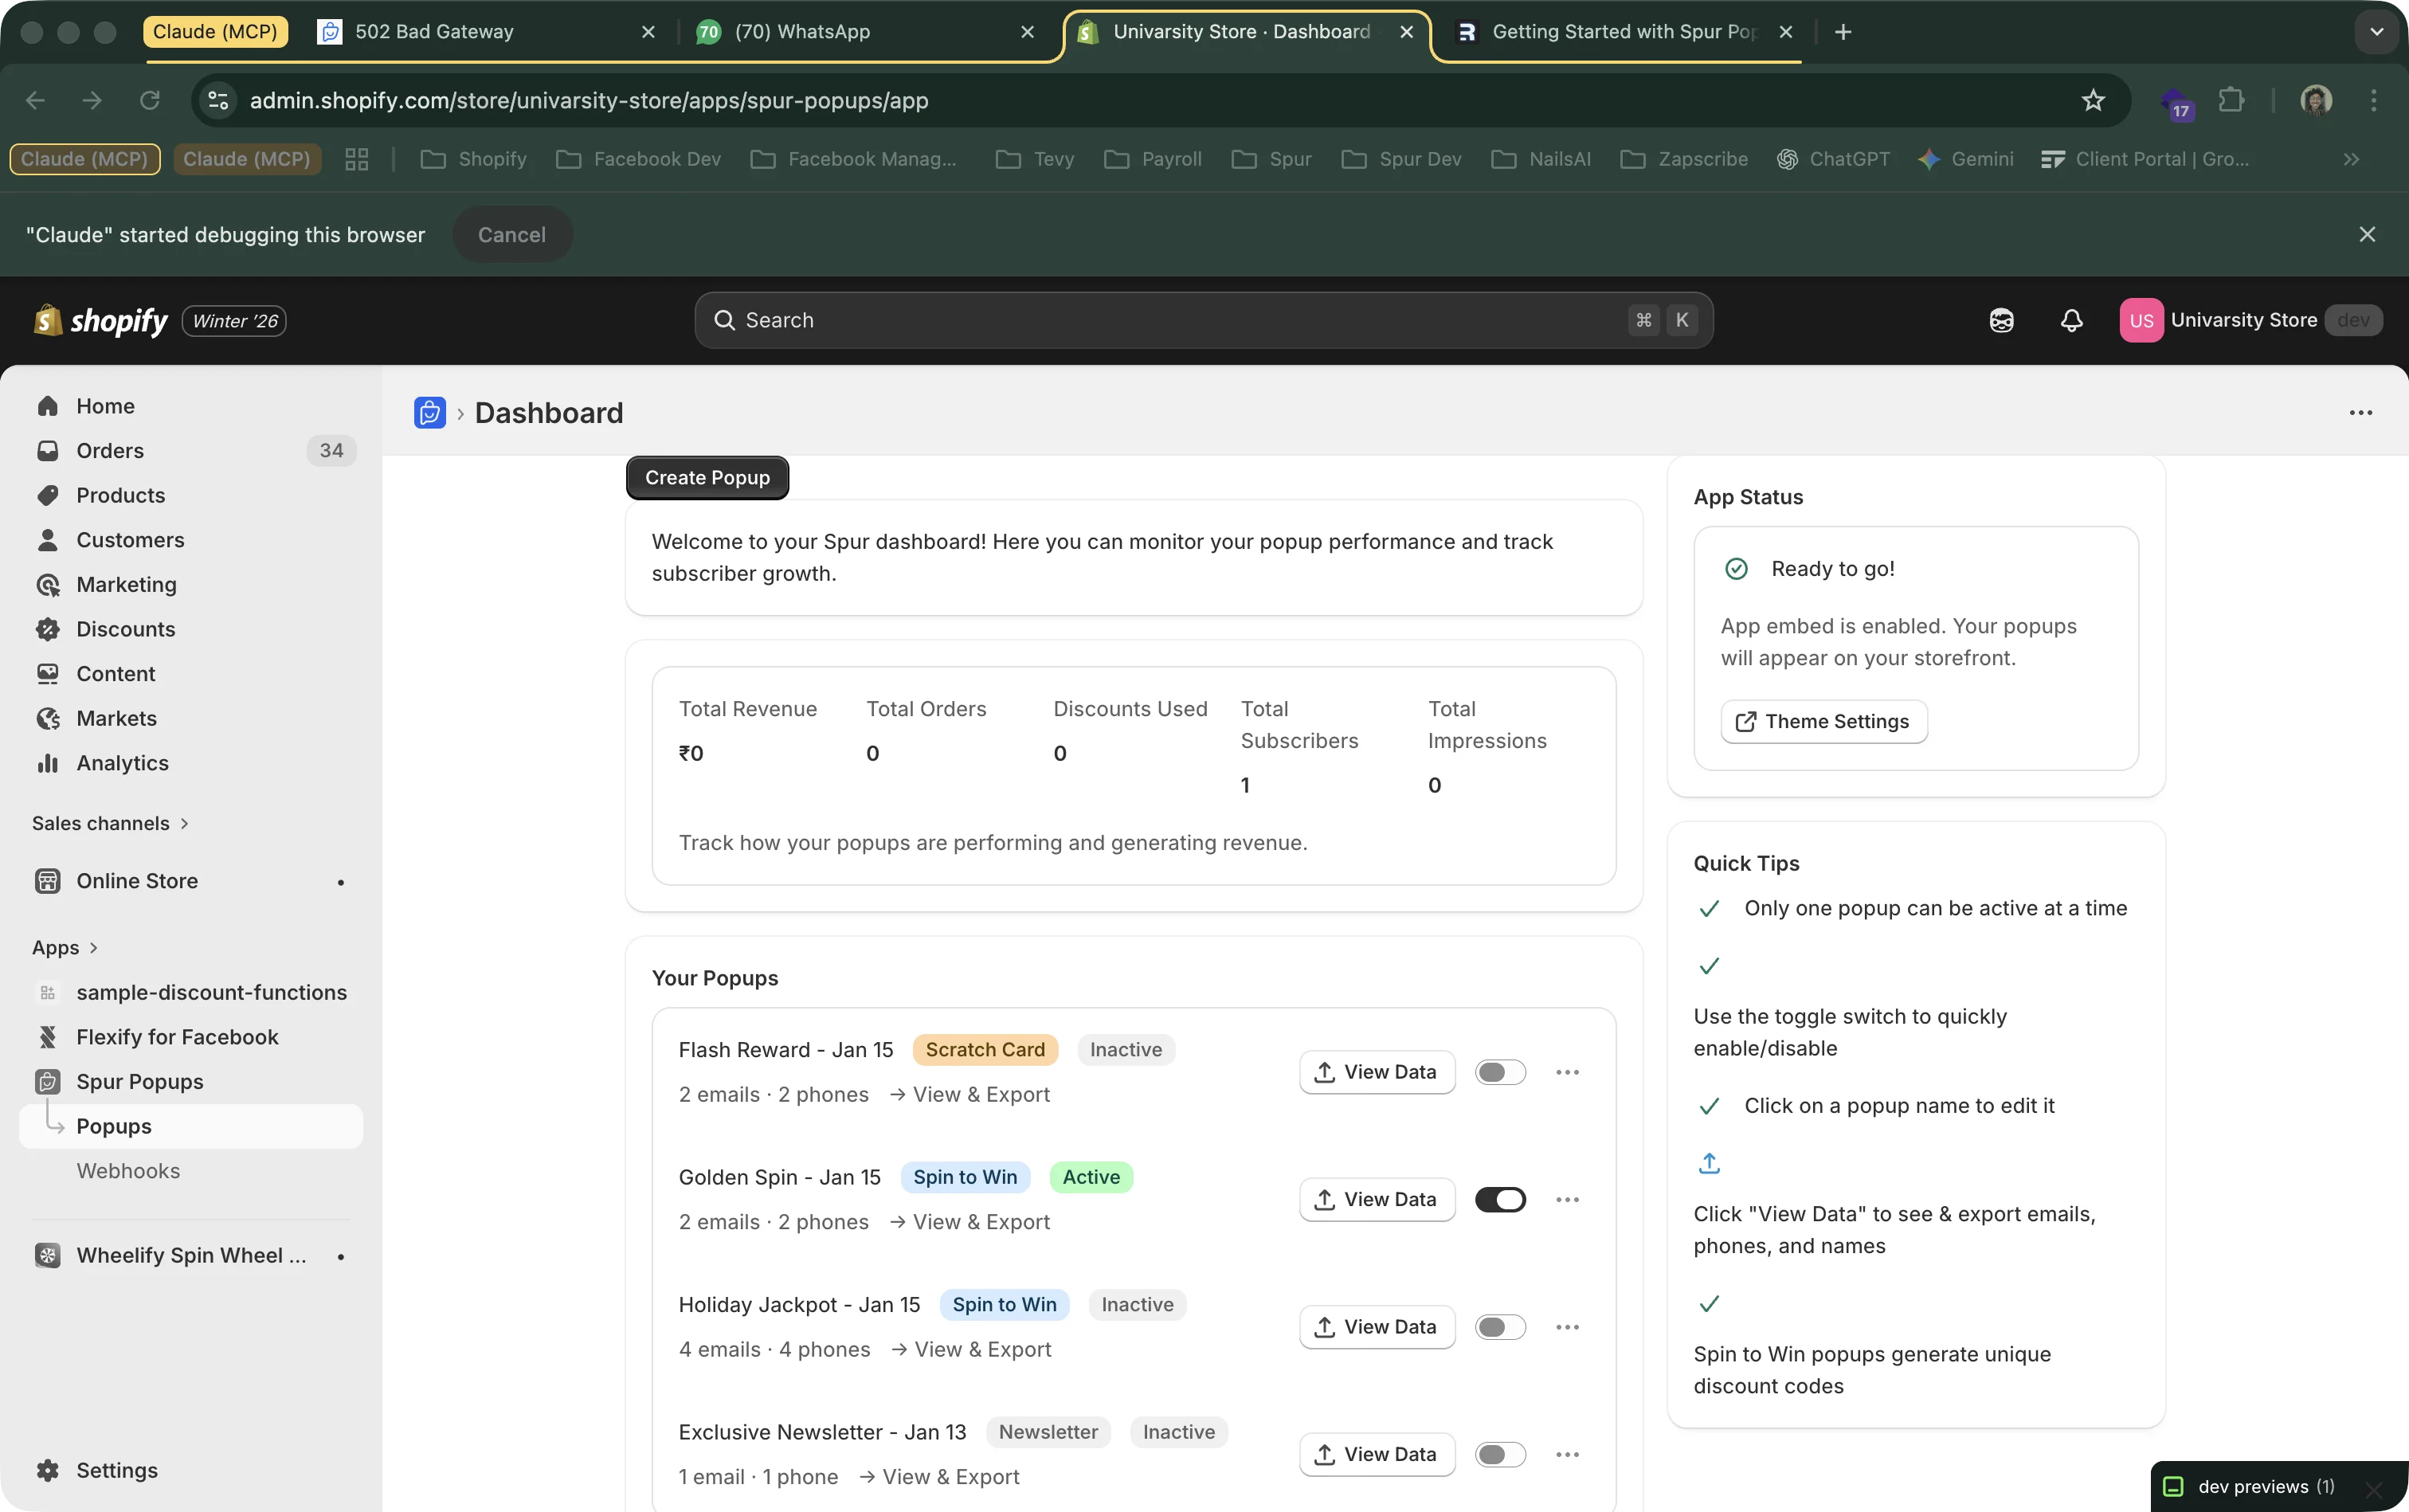
Metrics Bar
At the top, you'll see your total revenue, orders, discounts used, subscribers, and impressions across all popups.
Your Popups
Every popup you create is listed here. Each row shows the popup name, type (Spin to Win, Newsletter, or Scratch Card), status (Active or Inactive), and how many emails/phones it has collected. Click the name to edit it.
Toggle Switch
The toggle on the right of each popup activates or deactivates it. Only one popup can be active at a time — activating one automatically deactivates the others.
View Data
Click the "View Data" button to see analytics for gamified popups (Spin to Win, Scratch Card) or the subscriber list for Newsletter popups. You can also export everything as a CSV.
4Create Your First Popup
Click the "Create Popup" button at the top of your dashboard. You'll see three popup types to choose from:
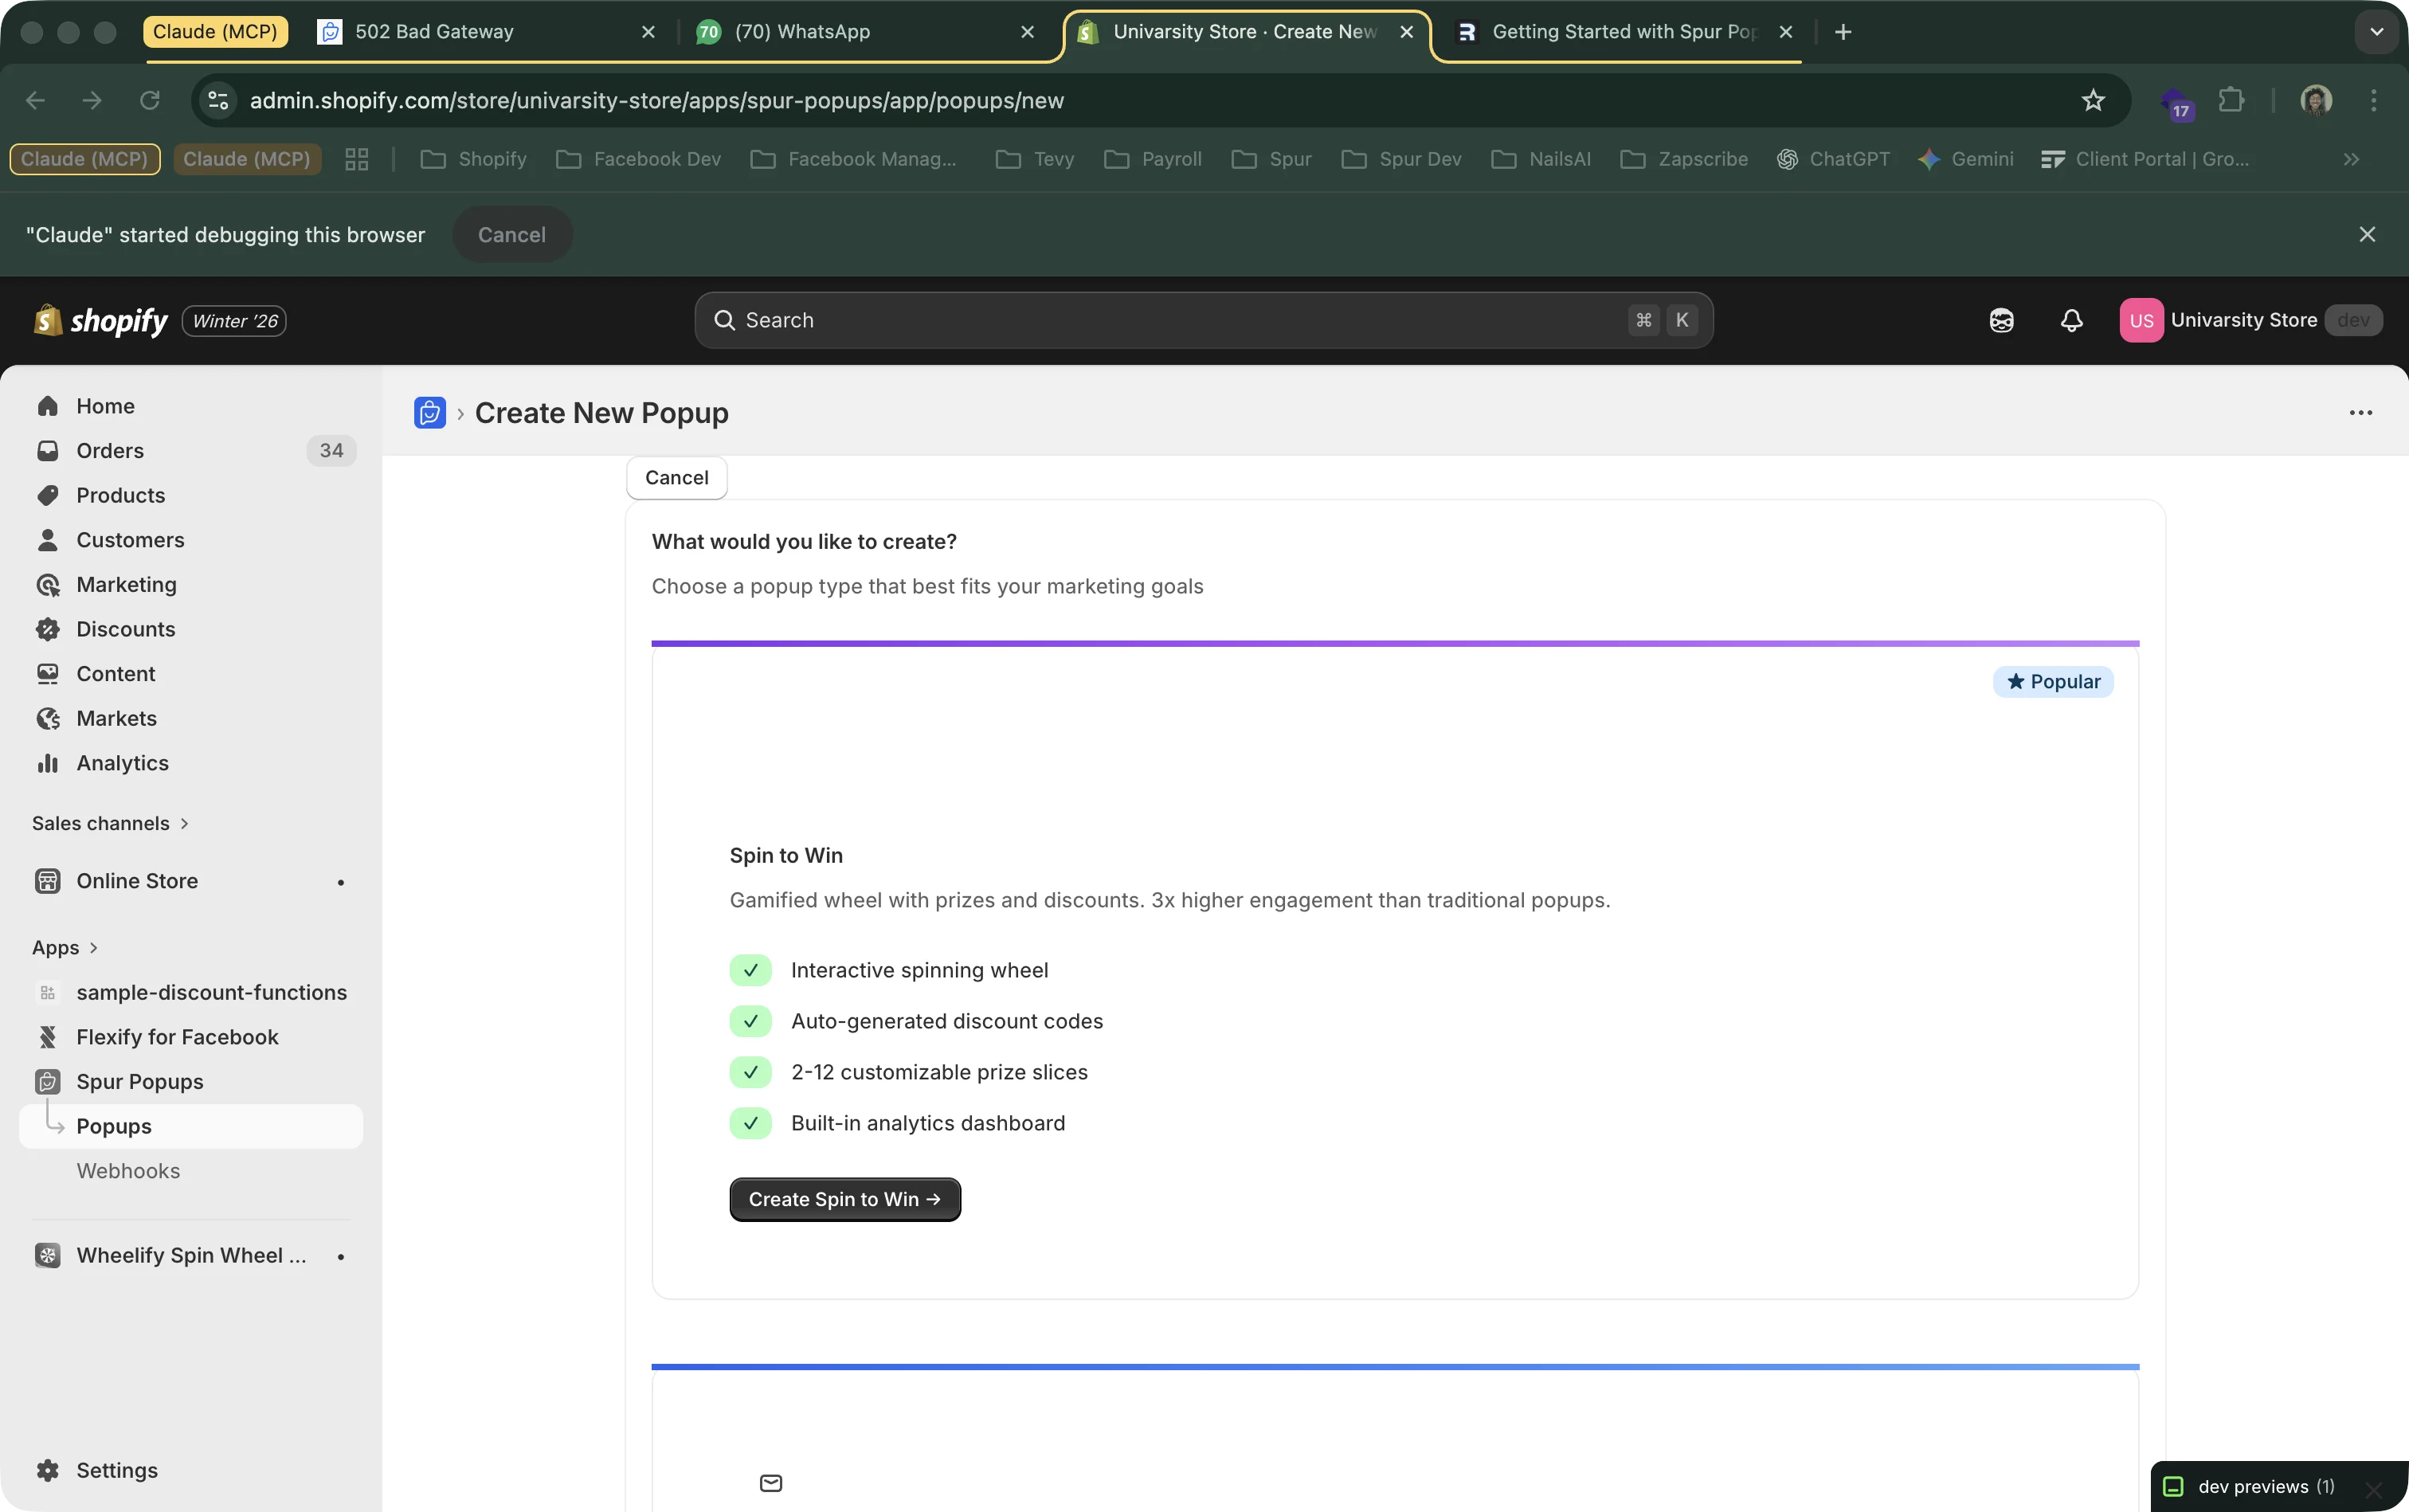
Spin to WinMost Popular
A spinning prize wheel that visitors interact with before getting a discount code. Visitors enter their email/phone, spin the wheel, and win a prize. Great for engagement — gamified popups convert 3x better than traditional ones.
Newsletter Signup
A clean, simple form that collects email addresses and phone numbers. You set a fixed discount (e.g., "Get 10% OFF") and visitors sign up to receive the code. Best for stores that want a professional, no-frills look.
Scratch CardNew
An interactive scratch-to-reveal experience. Visitors enter their details, then scratch a card to reveal their prize. Works especially well on mobile where the touch interaction feels natural. Great for product launches and holiday promotions.
Click the button for your preferred type. We recommend starting with Spin to Win — it has the highest engagement rates.
5Customize Your Popup
After choosing a type, you'll land in the popup editor. Every popup type has a live preview on the right side that updates as you make changes.

Here's what you can configure in every popup type:
Basic Information
Set an internal name (only you see this), a headline, and a subheadline. These are the main text visitors will read.
Fields to Collect
Choose whether to collect email, phone number, and/or name. Fewer fields = higher conversion. Start with just email and test adding phone later.
Prizes / Discounts
For Spin to Win and Scratch Card, configure multiple prize tiers (e.g., 10% OFF, 20% OFF, Free Shipping, Try Again). For Newsletter, set a single discount. Spur auto-generates unique Shopify discount codes.
Colors & Styling
Match the popup to your brand by customizing header color, button color, form background, and text colors.
Marketing Consent
Configure consent checkboxes for email, SMS, and WhatsApp marketing. Spur automatically handles GDPR compliance based on visitor location.
Click "Save Changes" when you're done. For detailed setup guides for each popup type, see:
6Activate and Test
After saving your popup, go back to the dashboard and flip the toggle switch next to your popup to activate it.
Remember: Only one popup can be active at a time. Turning on a new popup automatically turns off the current one.
Testing Your Popup
There are two ways to test:
Option 1: Test Popup Button (Recommended)
In the popup editor, click the "Test Popup" button. This gives you a special preview link that shows the popup immediately — no waiting for any delay timer. You'll also get a QR code you can scan to test on your phone.
Option 2: Visit Your Store
Open your store in a browser (or incognito window) and wait for the popup to appear. If you've set a delay, you'll need to wait that many seconds. If the popup doesn't appear, check that the app embed is enabled.
Troubleshooting: Popup not showing?
- 1. Check the App Status card in your dashboard — it should say "Ready to go!"
- 2. Make sure the popup's toggle is switched ON (active)
- 3. Try an incognito/private browser window (cached pages might not show the popup)
- 4. If you set a display delay, wait for it to count down